If you want your CPU to stay cool and run smoothly, thermal paste is important. It helps transfer heat from the processor to the cooler, preventing overheating. This guide offers simple, step-by-step instructions and tips on how to apply thermal paste to cpu correctly. Say goodbye to overheating problems and hello to a cooler, better-performing computer. Let’s get started with Thermal Paste Application 101!
What Is Thermal Paste?
Thermal paste (also known as thermal compound, thermal grease, or TIM, thermal interface material) is a soft, heat-conductive material that’s applied between your CPU or GPU and its heatsink.
What Does It Do?
- Improves Heat Transfer: Helps heat move from your CPU to the cooler.
- Prevents Overheating: Keeps temperatures down to avoid lag, slowdowns, or hardware damage.
- Boosts Stability: Keeps your system running cool and reliable over time.
What’s It Made Of?
Thermal pastes are made from:
- Base material: Silicone, epoxy, or acrylic (the sticky part that holds it together).
- Filler materials: Tiny particles that help transfer heat, like:
- Metals (silver, copper, aluminum)
- Ceramics
- Carbon (graphite, diamond powder)
Thermal paste is small but super important for keeping your computer cool and running well. Choose a paste that suits your needs, apply it properly, and enjoy better performance and longer component life!


Tools & Materials You’ll Need for Applying Thermal Paste
Make sure you have everything ready before starting. Here’s what you’ll need and why each item matters:
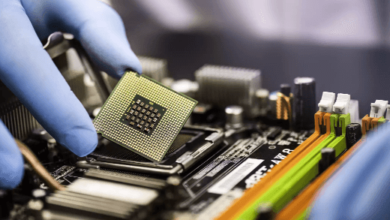
- CPU and Compatible Cooler/Heatsink
Make sure your cooler fits your CPU socket and that both surfaces are clean.
- Thermal Paste
Choose a good-quality paste like:
- T-Global S808 Thermal Grease.
- Thermal Grizzly Kryonaut.
- Isopropyl Alcohol (90% or Higher)
Used to remove old thermal paste and clean surfaces for better heat transfer.
- Lint-Free Cloth or Coffee Filter
Gently wipes off thermal paste without leaving fibers that could interfere with performance.
Optional but Helpful Tools
- Plastic Spreader or Card: (Optional) Helps you spread the paste evenly, especially useful on larger CPUs.
- Screwdriver: Needed to tighten the cooler evenly and securely in place.
Quick Checklist
- CPU + Cooler/Heatsink
- High-quality Thermal Paste
- Isopropyl Alcohol (90% or higher)
- Lint-free Cloth or Coffee Filter
- Plastic Spreader or Old Credit Card (Optional)
- Screwdriver
These tools are ready, you’re all set for a clean and effective thermal paste application,keeping your CPU cool and running smoothly!
Preparing to Apply Thermal Paste
Proper prep is key to getting the best cooling and keeping your CPU safe.
Power Down and Unplug
- Shut down your PC using the regular method (don’t just unplug it).
- Unplug the power cable and any other connected devices.
- Discharge static electricity by touching a metal part of your case or wearing an anti-static wrist strap.
- Static electricity can damage your PC components, so this step is very important.
Clean the CPU and Cooler Base
How to Clean the CPU Surface
What You Need:
- Isopropyl alcohol (90% or higher).
- Lint-free cloth, coffee filter, or microfiber cloth.
- (Optional) Q-tips for tight spots.
Steps:
- Dampen your cloth with a small amount of isopropyl alcohol (just damp, not soaked).
- Wipe the top of the CPU (IHS) in gentle, circular motions.
- Switch to a clean section of the cloth as it gets dirty.
- Use Q-tips for corners or leftover paste.
- Let it air dry,it usually dries in under a minute.
Even a tiny bit of old paste or dust can trap heat and lead to higher CPU temps.
Thermal Paste Application Methods
- Pea-Sized Dot Method (Best for most CPUs)
Put a small dot of paste (about the size of a pea or a grain of rice) right in the center of the CPU.
- Line Method (Good for long, rectangular CPUs – like many Intel CPUs)
Squeeze a thin, straight line of paste down the middle of the CPU.
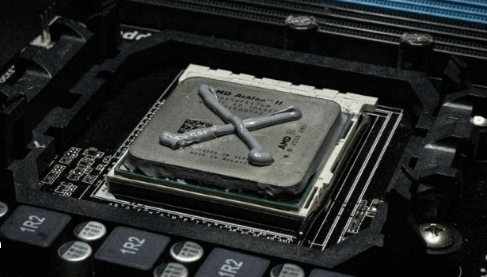
- X-Pattern Method (For large or oddly shaped CPUs)
Draw a thin “X” across the CPU surface.
- Spread Method (Only if you know what you’re doing)
Use a plastic card or a special tool to spread a thin layer of paste across the whole CPU surface.
Tips for a Clean Application
- Use just enough paste. Too much can insulate instead of cooling.
- Never touch the cleaned CPU or paste with your fingers,skin oils can mess with heat transfer.
- Always clean the old paste before applying new.
Following these simple steps helps your CPU stay cool and work efficiently!
How to Install a CPU Cooler – Step-by-Step
- Position the Cooler
- Align it carefully: Match the cooler’s mounting brackets with the holes or clips on your motherboard.
- Hold the backplate steady (if needed): Some coolers require a backplate behind the motherboard,hold it firmly in place while positioning the cooler.
- Apply Even Pressure When Tightening
- Use the crisscross (X) pattern: Start by gently tightening one screw. Then move diagonally to the opposite screw.
- Tighten a little at a time: Don’t fully tighten one side first,go slowly and alternate between screws.
- Stop when snug: Once all screws feel firm and you meet resistance, stop. Don’t over-tighten.
Why This Matters
- Even pressure = better heat transfer
- No air pockets = fewer hot spots
- Prevents damage = no warping or cracking
- Avoids loose fit = no vibration or poor cooling
After installation, turn on your PC and monitor CPU temperatures.
If they’re higher than normal, check that the cooler is sitting evenly and the pressure is balanced.